
First steps
Create a workspace, connect a GitHub repository, and generate your first developer document.
This guide walks you through creating a workspace, connecting a GitHub repository, and generating your first developer document. By the end, you'll have one document generated from your code and a document project that's ready to receive proposed updates as the code changes.
Prerequisites
- A GitHub repository with the code you want to document, either personal or owned by an organization
- For an organization repository, the ability to get approval from a GitHub organization admin
- Editor or higher permissions in the workspace so you can create document projects (whoever creates a workspace first is its owner)
- A Pro, Max, Team, or Enterprise plan. Document projects are a paid plan feature. The Pro and Team plans can start with a 14-day free trial.
On the Free plan, you can still use document writing, AI chat, and Workspace RAG. If you'd like to look around first, start with Tour the interface.
Create your first document
Sign up and create a workspace
Sign up at specify.app and create a workspace. You can start on the free plan without a credit card. To use document projects, switch to the Pro plan or higher (see Plans).
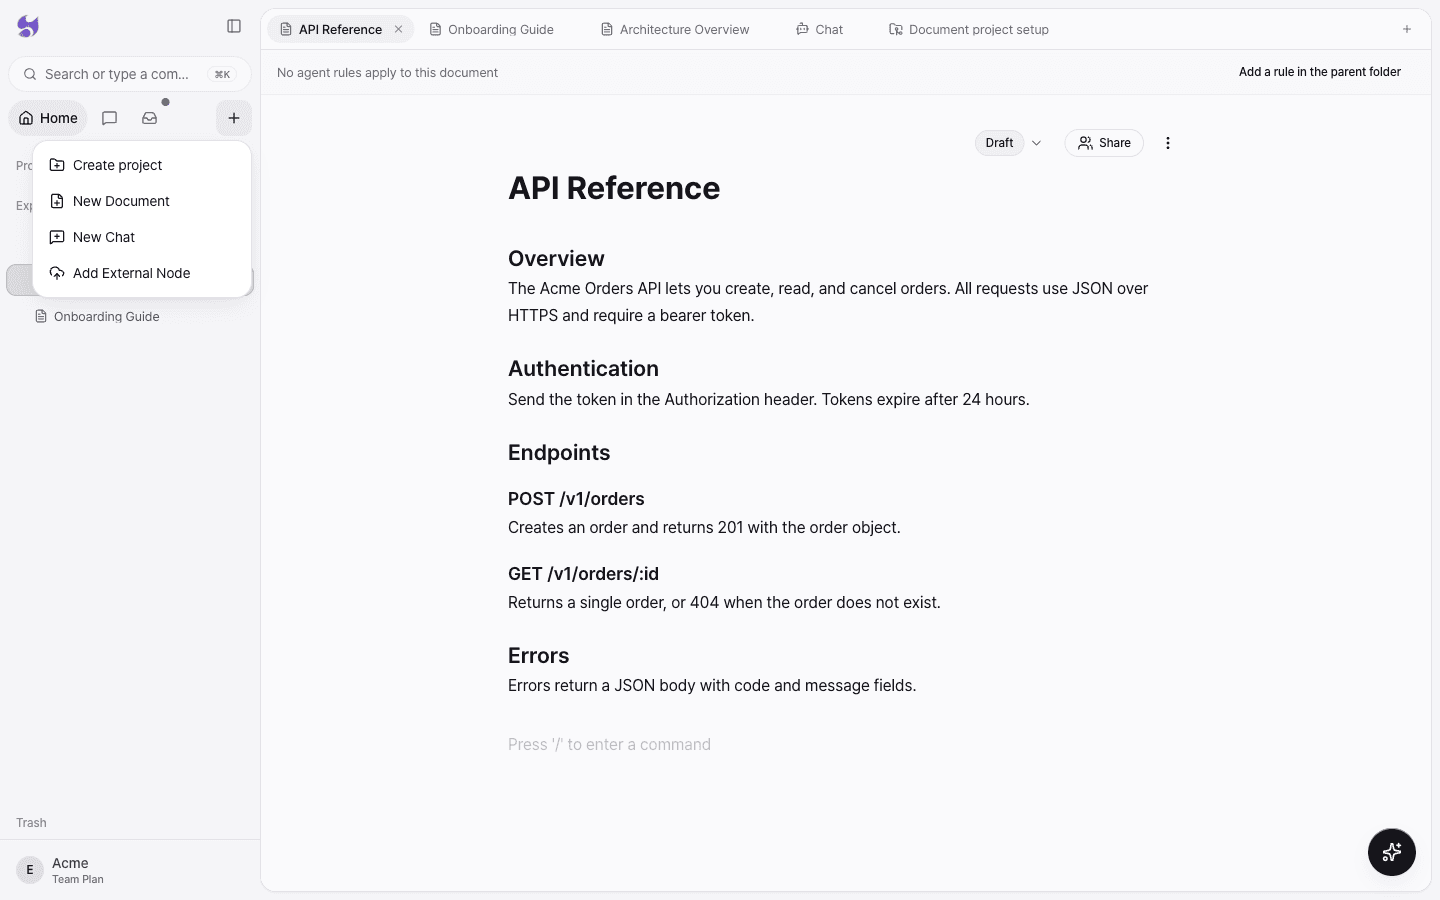
Open Create project
Select the New (+) button in the sidebar, then choose Create project. The Document project setup tab opens in the center.
Connect GitHub
In the Source step, select Connect GitHub, then grant Specify access to the GitHub account and repositories it should read.
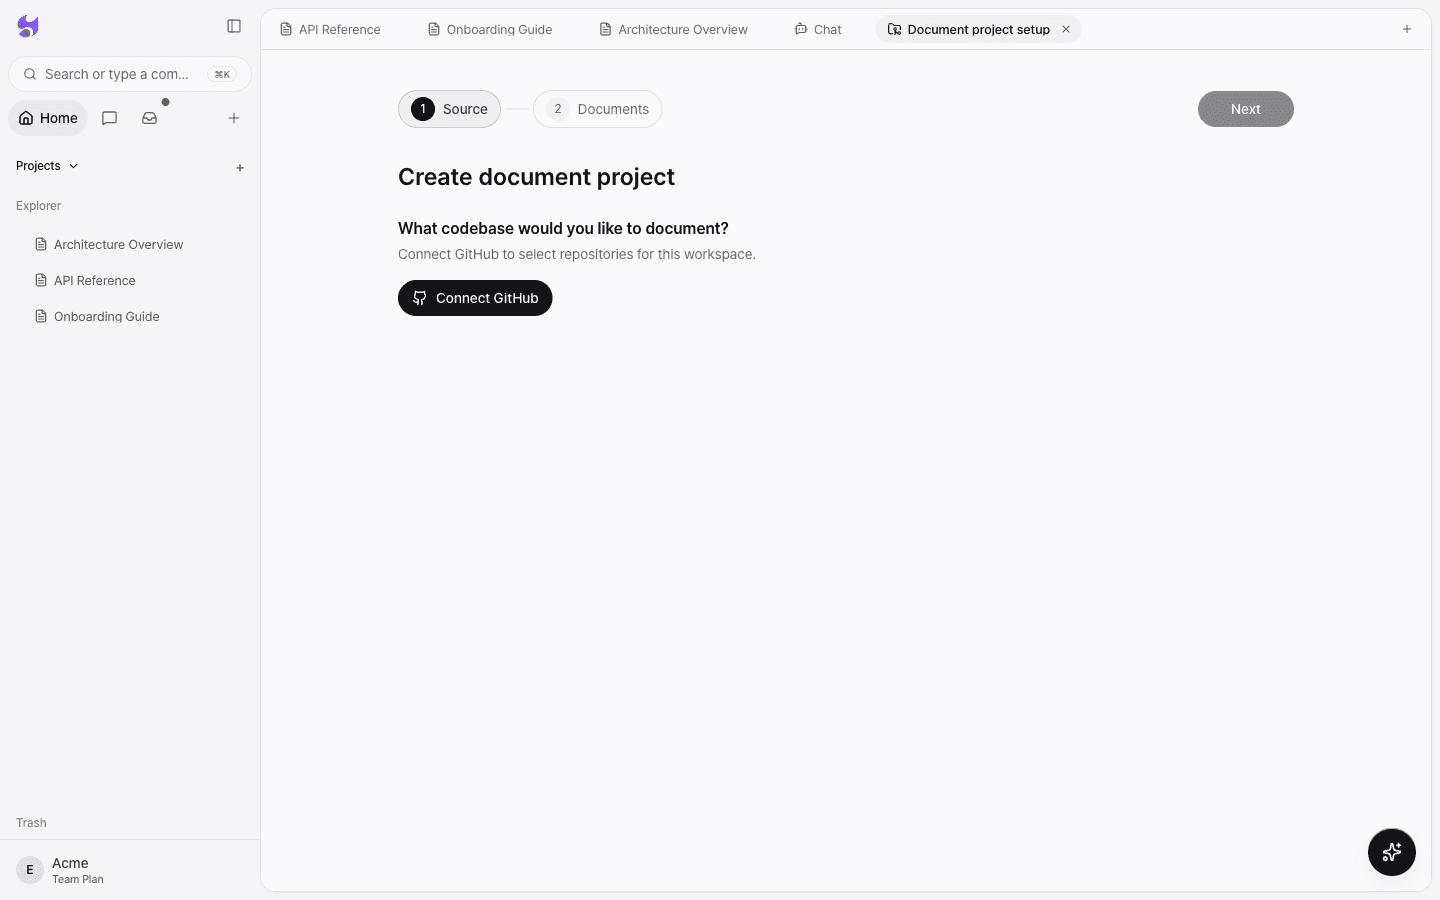
Organization repositories connect after a GitHub organization admin approves the request. Once it's approved, select reconnect on the same screen to finish. For details, see Connect GitHub.
Choose a source
Pick a GitHub account, choose the Repository and Branch to document, then select Next. This repository and branch become the evidence for every document and proposed update that follows.
Choose document types
In the Documents step, select the document skills the agent should create first. If there's something to emphasize this time, describe the audience, the topics to emphasize, and the level of detail you want in Focus for this run (optional). For example, you could write "Center it on the deployment procedure."
Choose an update mode
In the same step, turn on Automatically update on repository changes to have Specify prepare proposed document updates whenever code lands on the selected branch. Skills that regenerate the whole document every time don't support automatic updates; regenerate those when you need to.
Confirm your first document is generated
Select Create N document types, and the document agent writes the selected documents. You can close this screen. The Inbox keeps tracking the generation task and shows completed, failed, and try-again options.
Start with a single document. After you review the generated document with your team, you can generate additional guides or references in the same project folder.
After generation finishes
Generated pages keep links to their sources, so you can review later repository changes against precise evidence. Continue with the next steps.
Troubleshooting
| Symptom | What to check |
|---|---|
| The repository list is empty | Check that the selected GitHub account has repositories that Specify is allowed to access. Organization repositories require organization admin approval. |
| Document generation doesn't start on the Free plan | Document projects are available on the Pro plan or higher. See Plans. |
| You can't create a document project | Viewers can't create document projects. Ask a member with edit permissions. If workspace writes are locked, check your subscription status. |
| Generation is taking a long time | The Inbox keeps tracking the task even if you close the screen. When it finishes, you can see the result in the Inbox. |
| Generation shows that it needs attention | Your project is saved. Check the reason shown, then try again or change the source. |